
Powerpoint: rotate picture - how it works
To keep your PowerPoint presentation from looking boring, you can rotate your image to loosen it up. It is even possible to set the exact angle of rotation. In the following article we present the best methods from PowerPoint 2003 onwards.
Rotate an image in PowerPoint with the mouse
- Click the image.
- You will now see a pivot point above the middle upper handle.
- Click on it with the mouse and drag in the desired direction of rotation.
- As soon as you have reached the desired rotation, release the mouse button.
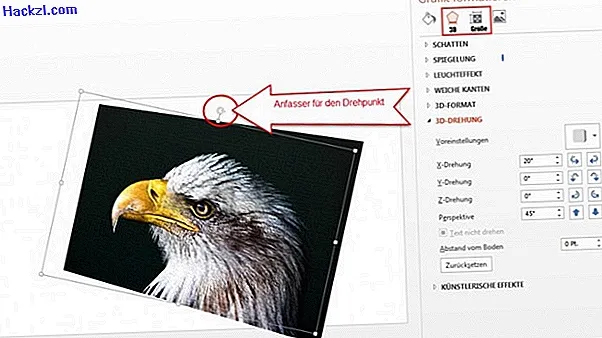
Set an exact angle for the rotation
- Right-click on the image and select either "Format Form" or "Format Graphic" depending on your version of PowerPoint.
- In the next dialog click on "Size".
- In the "Size" area, you can use the "Rotation" field to set the rotation angle very precisely.
- If your PowerPoint version supports "3D rotation", the image can also be rotated in all three axes.
- To do this, select the entry "3D rotation". Here you can also find some interesting 3D presets.
Rotate an image in 15 ° increments
- Use the mouse to drag the pivot point in the desired direction as described above while holding down the [Shift] key.
- Now your picture snaps in 15 ° steps as long as you hold down the [Shift] key.
- As of PowerPoint 2010, the 15 ° rotation also works very comfortably while holding down the [Alt key] and the cursor keys [Right] or [Left].