
QGIS: Tutorial for beginners
We show you what kind of QGIS is and what you can do with it in a kind of tutorial in this practical tip. You will also receive a first tutorial on creating a map.
What is QGIS and where do I get it from? - Tutorial for beginners
- QGIS is a free, open source geographic information system. With a little practice, you can create, edit, display and analyze spatial information here.
- With a little practice, you can use it to create, edit, view, and analyze spatial information.
- The program works on Windows, Mac, Linux and BSD.
- The latest version is QGIS 2.18.7. "Las Palmas. It was released on April 21, 2017. However, a much more stable version is version 2.18.
- You can easily find the installation downloads in the download area on the QGIS website. Select the desired operating system there and start the download.
QGIS: Creating a Map - Preparations: Tutorial for beginners
With the "Print Compilation" tool you can create a map from layers and collections in QGIS. To create a map, you need basic elements such as map, grid, north arrow, scale element and labels.
- At the beginning you need a data record. To do this, download the Natural Earth Quickstart Kit, for example.
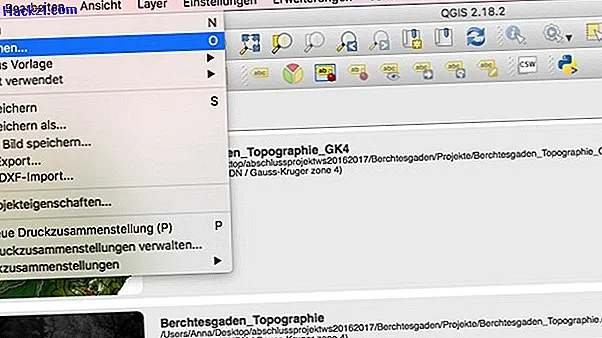
- Unzip the start kit. To do this, right-click on the data and select "Extract to". and open QGIS. Click "Project" and then "Open."
- Navigate to the directory in which you extracted the data you just downloaded. Open the file.
- Now you can see many layers in the legend on the left and right of a world map in the QGIS map window.
- Zoom in on the button so that you have enlarged a desired country to a section. We now take the example of Japan.
- Switch off the card layers on the right that you do not need for the card. To do this, deactivate the checkbox next to the respective layer. For example, you do not necessarily need the layers of the "marine polys" or the "map units".
- Now select a suitable projection. The data you have downloaded is in a coordinate reference system (KBS). However, this is quite unsuitable for a printed card. Select the Universal Transversale Mercator (UTM). Here the distortions are as low as possible. Click the "KBS Status" button at the bottom right of the QGIS window.
- Now activate the spontaneous KBS transformation. Enter "Tokyo utm zone54n" in the filter search field. In the results that appear, select "Tokyo / UTM Zone 54N-EPSG: 3095". Then click on "Apply".
QGIS: Create a map - how it works
- Now you can start creating the map. To do this, go to "Project" in the top left corner and then to "New Print Compilation". Select a desired title for the project and click "OK".
- Now go to "Layout" in the new window and select "Add card". Now use the left mouse button to drag a rectangle into the white area in QGIS.
- A map now appears in the window. Under "Layout" you will find the item "Move content". Use this to adjust and center the map in the window.
- On the right side you will now find a tab called "Element Properties". Enter 7000000 here at scale. How to correct the zoom level.
- Now switch to the QGIS main window. Zoom in here to the Tokyo area. Now switch off double layers by removing the checkmarks.
- Now add the detailed map by switching back to the print layout. Go to "Layout" and there to "Add map".
- Draw a rectangle where you want the overview map to be. You now have two cards in one. Activate a frame in the element properties of the new card so that it stands out from the other card. On the new map you can now see a smaller section of Tokyo.
QGIS: Create Map - Create Zebra Border and Grid: Tutorial for beginners
- Select the tab of the big map. Go there to element properties and select the sub-item "Grid". Click Add New Grid.
- Click on "Change ..." next to the KBS sub-item in the grid area. Now enter 4326 in the search filter in the coordinate reference system window. Then select WGS84 EPSG: 4326 from the results list. Then click OK". How to display the grid lines in an arc degree.
- Now enter the value 5 in the X and Y fields in the grid tab at Interval.
- Now go to the sub-item "Lattice frame". There you select the desired frame style, eg "Zebra". Below this you will find the sub-item "Draw coordinates", activate it with a check mark.
- Now adjust the map frame so that the coordinates are all legible and meaningfully distributed.
- You have now created a grid and a black and white frame for the map.
QGIS: Create map - add north arrow: Tutorial for beginners
- To add a north arrow, click "Layout" and then "Add Image".
- Draw a rectangle again, preferably the top right corner of the card. Various tabs now appear on the right. Under "Image" click on "Search directories". Now select the desired north arrow.

QGIS: Create map - add scale bar: Tutorial for beginners
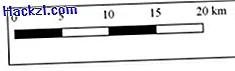
- To add a scale bar, click "Layout" and then click "Add Scale".
- Select a position in the layout where you want the scale to be.
- Choose the style that you like and that matches the card. Under "Segments" you change the number of segments.
QGIS: Create map - Caption: Tutorial for beginners
- For the label, click on "Layout" and then on "Add label".
- Click on the map and drag another box anywhere.
- In the right window you can now choose what you want to label.
QGIS: Finishing the map: Tutorial for beginners
- To complete the map, export it as an image, PDF or SVG.
- To export it as an image, click on "Compilation" and then on "Save as raster image".
- Save the project, for example in PNG image format.
QGIS: More tutorials for beginners
- You can find further help in the QGIS Learning Resources.
- You can also get many more tutorials from video platforms such as YouTube or the QGIS website.
In the next practical tip, we will show you which are the best offline maps for Android and iOS.