
Raspberry Pi: control GPIO pins - how it works
On this page we show you how you can easily control the GPIO pins of your Raspberry Pi. A picture gallery with the individual steps shows you the details.
Raspberry Pi: remote control GPIO pins with your smartphone
First of all, we would like to demonstrate how you can control the GPIO pins of your Raspberry Pi with your smartphone. We also show you all the steps in the picture gallery at the end of the article.
- First download the free "Blynk" app for iOS or Android. Start the app and create a free Blynk account.
- In this example we want to try to control a small lamp. To do this, first connect a cable to the sixth GPIO pin. This pin is a ground pin, which will subsequently act as a negative pole. Then connect another cable to the eleventh GPIO pin. This supplies a voltage of 3.3 volts and will later act as a positive pole. Then connect the cables with a small lamp. You may also need to insert a resistor here. With LEDs, you must also pay attention to the polarity.
- Open the Blynk app again and create a new project. Give the project a name, select your Raspberry Pi under "Choose Device" and finally select the type of connection.
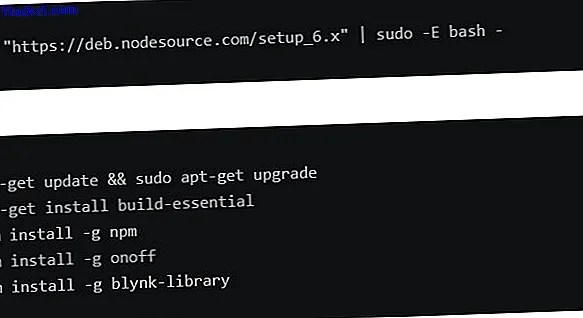
- Then start your Raspberry Pi and execute the command »curl -sL" //deb.nodesource.com/setup_6.x "| sudo -E bash - «(with quotation marks inside the command). Then update Raspbian with the command "sudo apt-get update && sudo apt-get upgrade". Then install "build-essential" with the command »sudo apt-get install build-essential«. Finally, with the Node Package Manager you have to add "npm" (with the command: »sudo npm install -g npm«), "onoff" (with the command: "sudo npm install -g onoff") and "blynk-library" (with the command: "sudo npm install -g blynk-library").
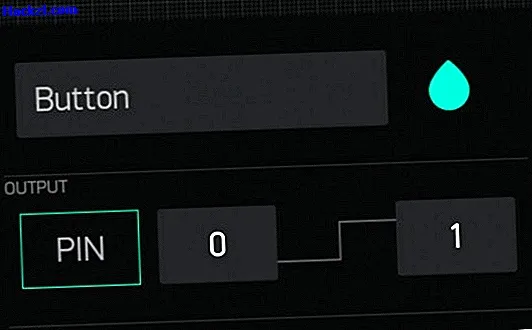
- Then add a new widget in the Blynk app: To control a small lamp, we simply recommend a normal "button". In the button settings, select the GPIO pin to which the lamp is also connected.
- Go to your email inbox. By now you should have received an automatically generated Blynk email that contains an auth token. With this auth token you can easily start the Blynk client. In our case we had to execute the command "blynk-client 715f8cafe95f4a91bae319d0376caa8c" in the terminal. Finally, click on the start button in the Blynk app.
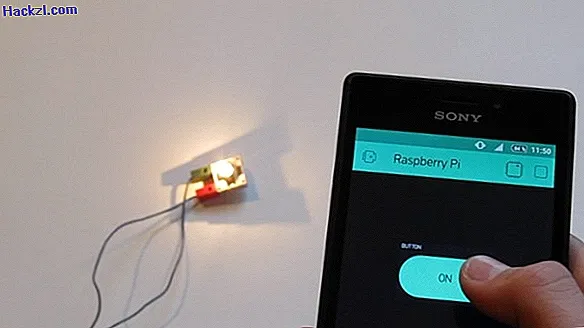
- Now you can easily switch the lamp on and off with your smartphone. We show all steps again in detail in our picture gallery.

Raspberry Pi: control GPIO pins with Python
Another very practical way to control the GPIO pins is to create a Python program. If you have never worked with Python before, we recommend our easy-to-understand Python tutorial. Then do the following:
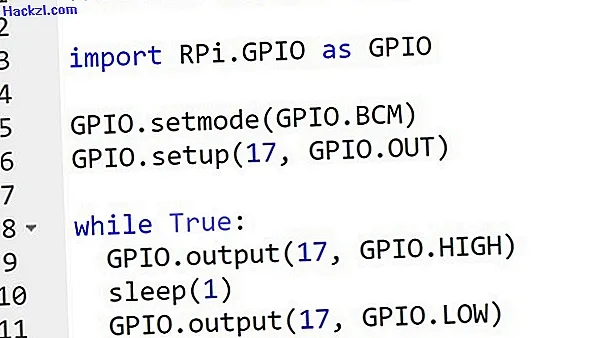
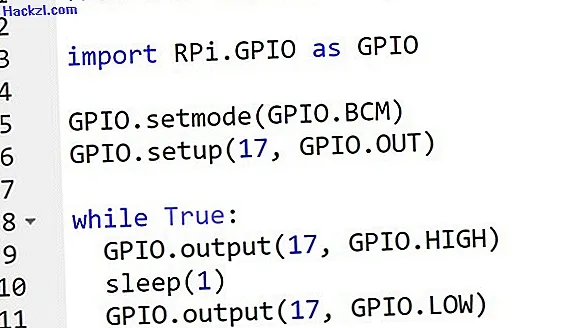
- First import the GPIO module for the Raspberry Pi into Python. To do this, add the "import RPi.GPIO as GPIO" command (without quotation marks) at the very beginning of your code.
- You then have to specify whether you want to address the GPIO pins using the board number (1 - 40) or the GPIO number. If you want the latter, you have to insert the command "GPIO.setmode (GPIO.BCM)".
- Then define a GPIO pin of your choice with the command "GPIO.setup (17, GPIO.OUT)" as output.
- Now you can set the GPIO pin to "HIGH" with the command "GPIO.output (17, GPIO.HIGH)" so that the lamp comes on, and with the command "GPIO.output (17, GPIO.LOW)" the Switch off the lamp again.
- Tip: The coolest Raspberry Pi projects to build
In the next practical tip we will show you how you can also read and write NFC tags with your Raspberry Pi. If you also enjoyed programming with Python, feel free to drop in on our Python programming language topic page. There we will give you valuable programming tips, completely free of charge.
Latest videos
Step 1: connect a lamp to your Raspberry Pi.
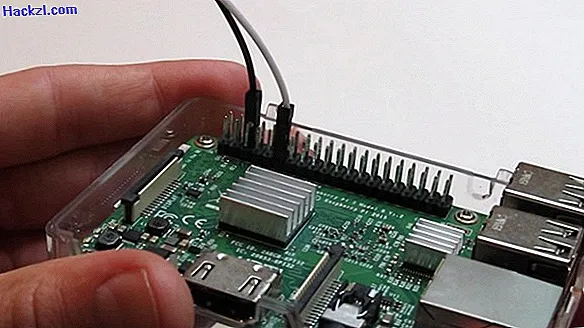
Note the different GPIO connections of the Raspberry Pi.

Step 2: install all required libraries.
Step 3: Download the Blynk app, create an account and add a button.
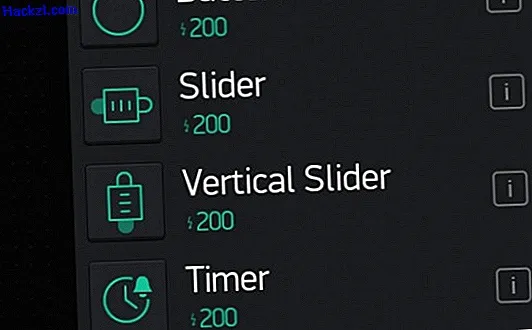
Step 4: In the button settings, select the GPIO pin to which the lamp is connected.
Step 5: Start the Blynk client on your Raspberry Pi with the auth token that you will find in an automatically generated email. Don't forget to press the start button in the app beforehand.

Now you can control the lamp remotely with your smartphone.
Alternatively, you can also control the GPIO pins with a Python program.
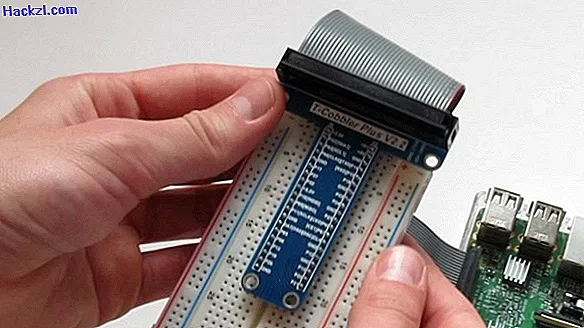
This T-Cobbler is very practical, with which you can connect the Raspberry Pi directly to a breadboard.
The Raspberry Pi 3 Model B currently costs around 35 euros.