
Smoke effect with gimp - how it works
In Gimp you can create impressive smoke effects and let it steam and smoke in your photos. Instructions and a picture gallery can be found here.
Gimp: Create smoke effects with the IWarp filter
- Open Gimp and use "File" to create a new document that is roughly the size of a column of smoke - a little more than twice the width. Then fill the background with white paint. This way you can better recognize the smoke later while you are working on it.
- Now add a new layer in the layer menu with "New Layer ...", select "Transparency" as the layer fill type in the dialog box and click "OK".
- Set a dark gray as the foreground color and draw a thick, vertical line with the brush tool. Then use a lighter shade of gray and a smaller brush radius to draw a second stroke (approximately in the middle of the first). It is not important that you work very precisely, the strokes can easily get crooked and crooked.
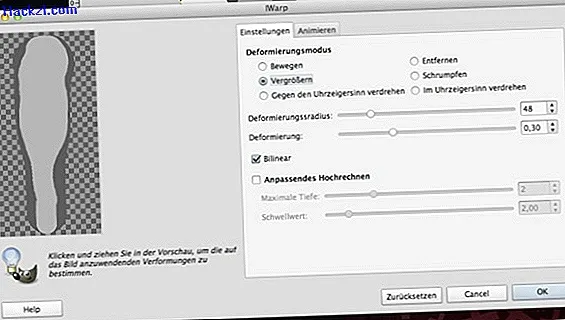
- Now open the "IWarp" filter, which you will find in the "Filters" menu under the "Distortion Filters". Select the "Enlarge" deformation mode and a deformation radius of approximately 30 to 60.
- Now move in the preview window with the mouse button pressed from the middle of your stroke to its upper edge. Repeat the process, if necessary, one or two times until your line is much thicker in the upper half than in the lower half.
- Now switch the deformation mode to "Shrink" and move in the preview window with the mouse button pressed down from the middle of your stroke. When you are satisfied with the result, click "OK".
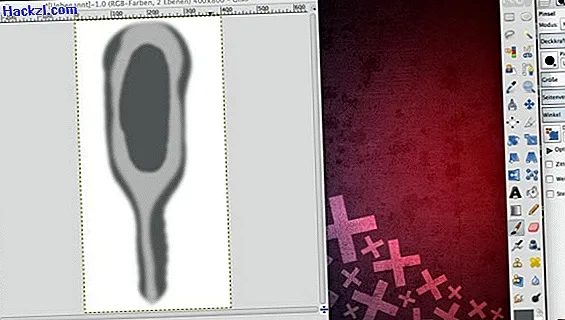
- Use the Gaussian blur to blur your image with a radius of around 10 to 20 pixels. You will find the "Gaussian blur" in the "Filter" menu under "Blur".
- Then use the eyedropper to select the darker shade of gray from your image as the foreground color and draw an oval in the upper area of your stroke with the brush. Again, it is not important that you work particularly precisely.
- In the "Filter" menu, click on "Repeat Gaussian blur" to soften your image again with the values set previously.
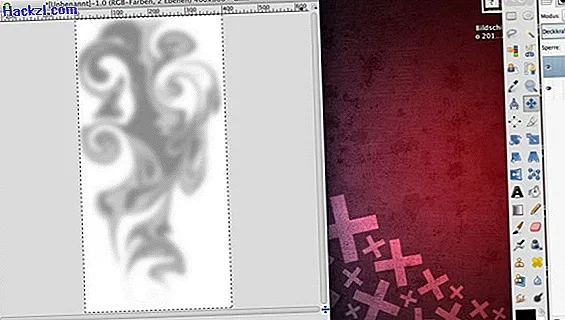
- Open the "IWarp" filter again, but select "Twist counterclockwise" as the deformation mode this time. In the preview window, hold the mouse button down and move your stroke up and down a few times until the swirls resemble a cloud of smoke. Then click "OK".
- Now apply Gaussian blur again, setting a radius of 20 to 30 pixels.
- Now you can copy the layer on which your smoke is located and paste it into another image. The whole thing looks even more realistic if you reduce the opacity of the layer with the smoke a little in the new document. You can reread the individual steps in our picture gallery.

Learn how to create a glowing starry sky with Gimp in this practical tip.
Latest videos
Create a transparent layer against a white background.

Draw two vertical lines of different thickness using different shades of gray.

Use the IWarp filter in the deformation mode "enlarge" and "reduce" to define the rough outline of your smoke cloud.
Edit the intermediate result with the Gaussian blur.

Draw a dark gray oval in the top of your strokes and reapply the Gaussian blur.
Use the IWarp filter to insert swirls in the "anti-clockwise rotation" deformation mode.

Finally, soften your smoke again.
If you want to paste the cloud of smoke into another image, slightly reduce the opacity of the layer that contains the smoke.
