Create a retro effect in Photoshop - Here's how
Related Videos: How To Create an 80's Style Chrome Logo Text Effect in Photoshop (May 2024).
In this little tutorial we will show you how to use Photoshop to create a retro effect for your photos.
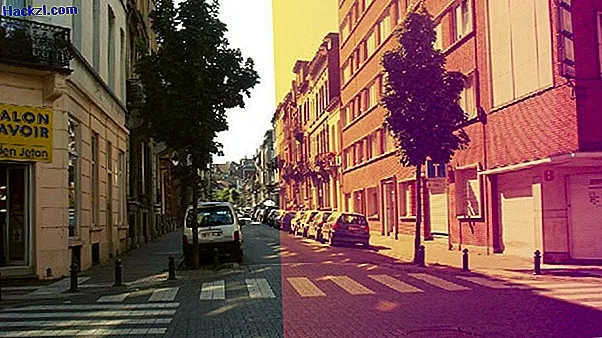
This is how photos get a retro look with Photoshop
In the picture gallery we have summarized the individual steps and settings for you. The values used are only indicative. The exact properties depend on the initial image. Try a little until you find the optimal result.
- Open the image in Photoshop and first make a copy of the background layer.
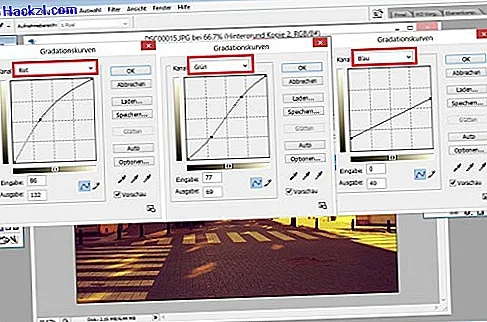
- The color cast is typical of the retro look. You create that with the gradation curves. The dialog window for these settings can be found under "Image -> Adjust -> Gradation Curves". Here you set the curves for the channels red, green and blue separately. In the picture gallery you can see what the curves for the channels should look like.
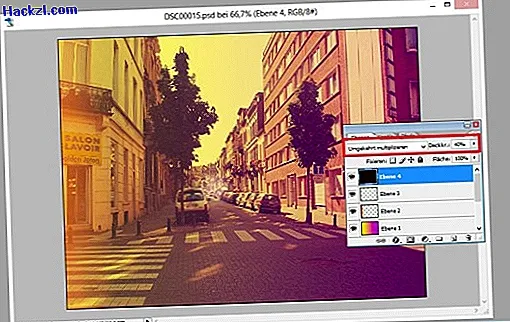
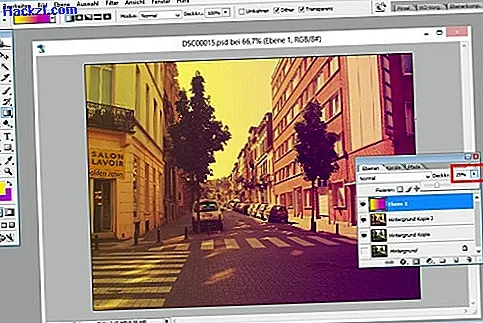
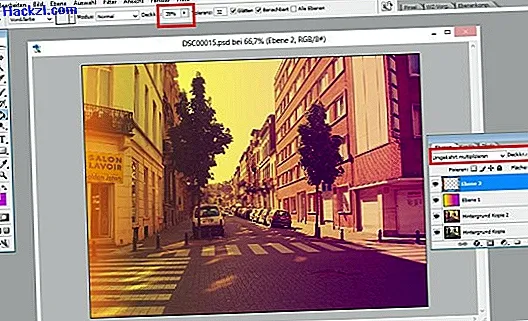
- Next, create a new layer for a gradient. In our example, we chose a light yellow as the foreground color and a dark purple as the background color. Now drag a gradient from left to right using the gradient tool. Reduce the opacity of the layer to 25% to complete the color cast.
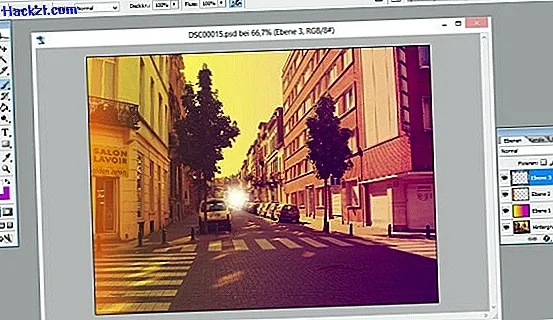
- Old cameras have often left an annoying light effect. To do this, choose a bright red as the foreground color and the gradient tool from "foreground color" to "transparent". Now drag the gradient from left to right on a new layer, but only about three centimeters. Set the mode for the layer to "Reverse multiply" and the opacity to 60%.
- You create the typical overexposure by creating a new layer and painting a dot in the center with the white foreground color and the soft brush tool. The mode for this layer should be "Soft Light".
- Old recordings are not as sharp as today's cameras. They are usually somewhat granular. You also need a new layer, which you fill with black this time. Via "Filter -> Structuring filter" you get to "Grain". The settings can be found in the screenshot of the picture gallery.
- The grain size becomes a little softer with "Filter -> Soft Focus Filter -> Gaussian Soft Focus". We have chosen a pixel as the radius.
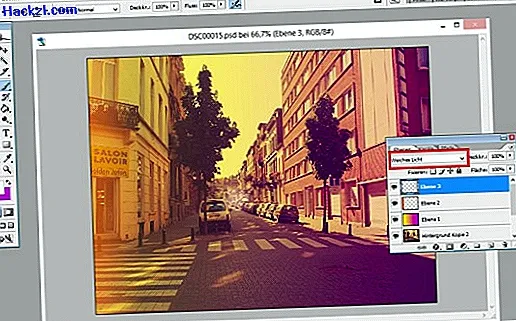
- If you now reduce the opacity of this layer to 40% and set the mode to "Reverse multiplication", your photo will appear in a retro look.
Would you rather not trim a photo to old, but rather improve it? In another practical tip, we will show you how to correct a color cast with Photoshop Elements.
Latest videos
You create the color cast via the gradation curves of the individual channels.
The color gradient from enhances the retro effect.
You get the annoying light effect with a small color gradient from the side.
The transition is typical for old recordings.
By changing the level setting, it appears realistic.
The grain must not be missing in the retro effect.

The grain is further processed with the soft focus.

With the right layer settings, the retro effect is perfect.