
Use Scan PST and repair Outlook files
If your personal folder in Outlook is damaged, you can repair it with the file ScanPST.exe. We show you how this works in this guide.
Repair Outlook files with ScanPST
The following steps were tested with Outlook 2013. Under older versions, some functions may be titled or arranged differently.
- First, close Outlook. Then press the Windows key and E at the same time so that the Explorer opens.
- Navigate to the path C: \ Program Files \ Microsoft Office. Then, depending on your version of Office, open the "Office12", "Office15" or a similar folder.
- Scroll down a little and open the file "SCANPST". Note: If you cannot find the SCANPST.exe file, you can download a similar file in step 1 of this Microsoft article.
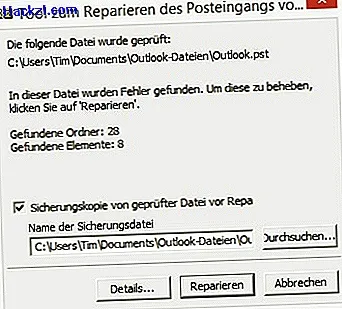
- Once you have opened the tool, the PST file is automatically searched for. If the path is correct, click the "Start" button. Otherwise, you can change the path using the "Browse" option. The PST file is usually in your own documents.
- The file was searched after a few seconds. If errors were found, click the "Repair" button.
Repair repaired Outlook data file
In many cases, Outlook automatically accepts the repaired PST file. If this is not the case, you have to insert it manually.
- Open Outlook and click the "File" tab in the top left.
- Go to the "Open and export" category on the left and select the "Open Outlook data file" option.
- Select the new or repaired PST file here. Then Outlook should work properly again.
- Note: The file may have been replaced during the repair and not just repaired. In this case you have to select the new PST file.

In the next practical tip, we will show you how to create a vacation notice in Outlook.