
Sony Alpha 6000: How to take night shots
Related Videos: How to shoot in low light with Sony a7 a6000 - a6300 series cameras! Tutorial (May 2024).
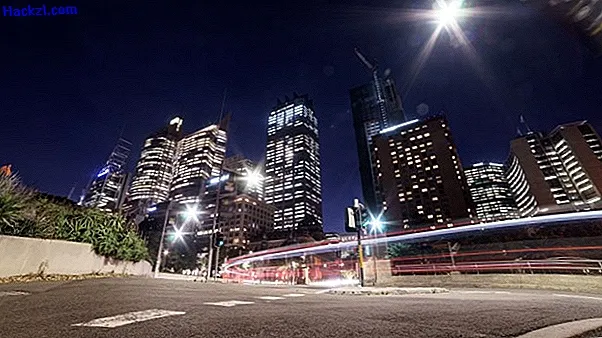
Night shots with the Sony Alpha 6000, a popular entry-level camera, work wonderfully if you follow some important principles. We show you how to take great pictures at night with this and other Sony Alpha models.
Night shots with the Sony Alpha 6000: equipment
If you approach the subject of night photography for the first time, you have a good camera with the Sony Alpha 6000. The sensor is comparatively low in noise and ensures decent image quality even in the dark. The following accessories are not absolutely necessary, but they are a great relief:
- Tripod shots at night usually have to be exposed for several seconds so that the photo is sufficiently bright. However, you cannot hold the camera in your hand, otherwise the image will be blurred. You should therefore take a small tripod with you at night to mount your Alpha 6000 on.
- Bright lens - The included kit lens of the Sony Alpha 6000 has an aperture of 3.5 to 5.6, which is not a very good value. The following applies: the lower the f-number, the larger the aperture and the more light falls on the sensor. A wide-angle lens with an aperture of 2.8 or lower is ideal for optimal night shots.
- Tip: The Samyang 12mm, with a strong aperture of 2.0, is very popular for landscape and city photography at night.
- Replacement batteries - Especially in the cold season, we recommend a replacement battery for the camera. The Sony Alpha models only have an average battery life and can sometimes run out faster than expected in the cold. With an additional battery you are on the safe side.
With these settings, the night shots are successful
Once the equipment is in place, night shots with the Sony Alpha 6000 hardly work differently than with conventional DSLR cameras. You should consider these basics:
- First, select the recording program on the camera. The setting "A" (aperture preselection) is recommended here. You specify the aperture and the ISO value manually, the camera searches for a suitable exposure time.
- Set the smallest f-number - i.e. the largest aperture - on the control dial. This is 3.5 for the kit lens. This means that as much light as possible falls through the lens onto the sensor.
- How high you choose the ISO value depends on whether you are photographing with a tripod or by hand. With a tripod you can set a rather small number at the ISO (approx. 100 - 400) and thus reduce the image noise. The exposure time can then be several seconds, but this is not a problem due to the fixed position on the tripod.
- Without a tripod, you have to screw the ISO value up sharply to keep the exposure time short. Most of the time you move around values around ISO 1600 - 6400. The resulting exposure time must be so short that you can take pictures from your hand without blurring.
- If there is little ambient light, there may be problems with the autofocus. If your camera cannot find the focus reliably, you can try manual focus and adjust the focus yourself on the lens. For landscape and architecture shots with a wide-angle lens, you can set the focus to infinity.