
Set up Synology Photo Station - Here's how
With a Synology Diskstation, your files are always at hand over the network. This practical tip shows you how to set up the Photo Station and access your photos and videos from anywhere.
Set up Synology Photo Station - Here's how
First, you need to install Photo Station on your disk station. To do this, follow the steps below:
- First, make sure your Synology Diskstation is turned on and set up. If you need help with this, read our practical tip on setting up your disk station.
- Now call up the web interface of your disk station by entering the IP address of the NAS or your QuickConnect address in the address bar of your browser. If you do not know the IP address, you can find it out via //find.synology.com/.
- Log in with your access data.
- Open the parcel center.
- Search for "Photo Station" using the search bar.
- Select the appropriate search result and then click on »Install«.
- During the installation, a firewall notification appears, ticking all the ports listed and confirming with »OK«.
- Once the installation is complete, you can click the "Open" button to start Photo Station.
- By clicking on "Settings" you can change any settings regarding the Photo Station, the albums and the share, if desired. Then click on "Save" and finally on the top left on "Back" to return to the main page of Photo Station.

Store photos and videos on your disk station with Photo Station
After launching Photo Station, you can directly upload your photos and videos, archive them in albums and finally access them on different devices via the cloud. Once you've started Photo Station, proceed as follows:
- Select "Albums" on the left, then you can open a new album by clicking on "Add" and then on "Create album".
- You can choose a folder name and a description of your choice.
- Under »Permission type« you can decide whether only you or others can access this album.
- Then click "OK" to create the album.
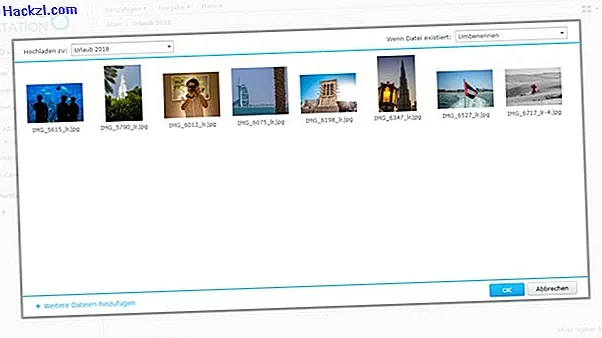
- With a click on "Add" you can now add photos to this album. To do this, either select images that are either on your computer or that are already stored on the disk station.
- Confirm the selection and then your photos will be loaded into the Photo Station.
- After the upload is complete, you can view your photos in your new album.
Access your photos from other devices
There are a number of apps for different devices that you can use to access your photos from anywhere.
- For Android, iOS and Windows there is the free "DS Photo" app, which gives you access to your photos from your mobile device.
- There are also apps for TVs, such as Amazon Fire TV, that allow you to view your photos on the big screen.
- On any other device, you can access the photos on your disk station via the browser as described above.
If you have problems with the login of your Synology Diskstation, we will explain in another article how it works.