
Activate the Telnet client under Windows 7
Related Videos: Windows 7 - How to enable Telnet (May 2024).
If you want to use the Telnet client under Windows 7, you have to activate it first. The function for this can be found hidden in the system.
Find and activate the Telnet client under Windows
- Click on "Start" and then on "Control Panel".
- Select the "Programs" there. Under "Programs and functions" you will find the entry "Activate or deactivate Windows functions" in blue letters. Click on this entry.
- A window with various functions opens. Look for the "Telnet client" and tick the box to the left. Confirm the change with "OK".

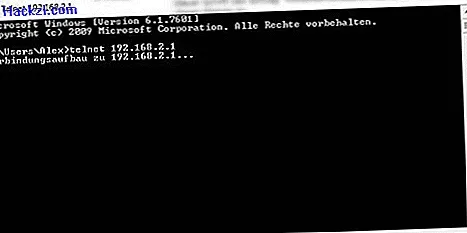
Address a network or a server with the Telnet client
To establish a connection via the Telnet client, you have to enter a simple command.
- Click on "Start" and enter "cmd.exe" in the search field.
- Enter the command "telnet" and the corresponding IP in the console (for example: telnet 192.168.1.2). Press Enter and the computer will establish the connection.
Keep in mind that confidential information can be easily read out via Telnet as this client sends unencrypted. If possible, use Secure Shell instead. The free client "PuTTY" supports both the Telnet and the SSH protocol and makes some tasks easier for you.