
Create a wax seal with Gimp - how it works
Related Videos: Make a medieval wax seal (May 2024).
With Gimp you can create your own wax seal. We show you how this works in this guide.
Create an individual wax seal with Gimp
Instead of sealing wax and stamps, you only need the image processing program Gimp to create your own wax seal. In the picture gallery you can understand the individual steps including screenshots.
- Open a new image in Gimp with the background color white. Then create a new layer with a transparent background.
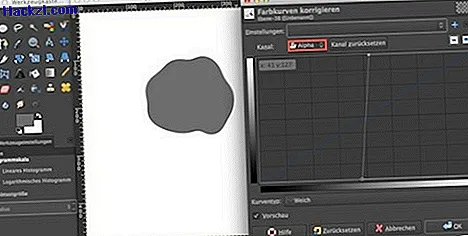
- Paint an asymmetrical surface with a soft brush in a shade of gray, which will later become the seal.
- You can remove the semi-transparent areas with "Colors -> Curves". Set the channel to "Alpha" and change the curve according to the screenshot in the picture gallery.
- Right-click on the layer with the wax stain. In the context menu, click on "Selection from alpha channel" and then make the layer with the eye symbol invisible.
- Now switch to the channels dialog, create a new channel and name it "Rounding down". Also activate the "Initialize from selection" option. You can now deselect it.
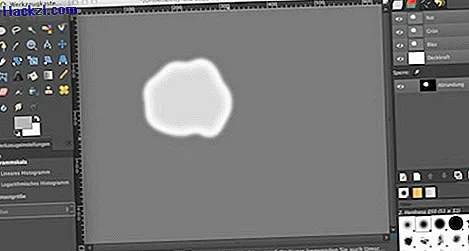
- Call up "Filter -> Blur> Gaussian Blur" and apply it with the setting 9. Repeat this process once with the value 6, then 3 and finally 1.
- Return to the Layers dialog and right-click on the layer with the wax base shape to select "Selection from alpha channel" again.
- Activate the created channel again. Set the value 15 pixels in the menu "Selection -> Reduce", in the menu "Selection -> Hide" 25 pixels. Select #bababa as the foreground color and navigate to "Edit -> Fill with foreground color". You can then deselect it again.
Stamp and color
- Use the elliptical selection tool to draw a circle in the center of the wax stain. Now fill the selection with the foreground color black. The fill appears gray because the opacity of the channel was set to 50% when it was created.
- Cancel the selection again and apply the Gaussian blur with the value 4 pixels.
- Now make the channel invisible by clicking on the eye symbol and switch back to the level. Make the layer visible again and make sure that it is activated. In the menu "Filter -> Light and shadow -> Light effects" the little blue dot should be a little to the left above the wax surface. In the "Bumpmap" tab, select the "Rounding" channel as the image and set the height to 0.05.
- As a stamp print, you can now either load an image as a layer or insert text, as in our example. It is important that you then set the layer in the context menu to "Layer to image size". Use the "Colors -> Curves" menu according to the screenshot.
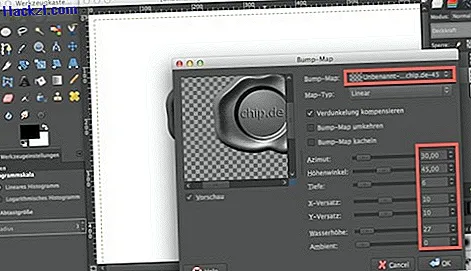
- Then make the layer with the stamp or the text layer invisible and switch to the layer with the wax seal. Here you apply "Filter -> Map -> Bumpmap". The values can be found in the screenshot in the picture gallery.
- Now only the color is missing. You can achieve the beautiful seal red with "Colors -> Color balance" and the following settings: Shadows: 17 / -22 / -52, mids: 50 / -14 / -30, heights: 11 / -25 / -17.
Latest videos
The starting point for the seal is a gray spot that you paint with a soft brush.

The edges of the surface become clearer with the curve tool.
After using Gaussian blur several times, the image should look like this.

Changing the selection and filling the area creates this image.
The circle selection forms the later stamp impression.

The stamp wax is almost finished, now the stamp printing is still missing.

An image or text for the stamp.

These values give the impression its depth.
The wax seal gets the red color.
