White balance in Adobe Photoshop - how it works
If the colors in a photo look fake, your camera may have made the wrong white balance. We will show you how to correct this in Photoshop below.
White balance in the RAW converter from Adobe Photoshop - so it'll work
If you took your pictures in RAW format, you can make the white balance directly in the RAW converter from Adobe Photoshop. To do this, open your photo with the RAW converter from Photoshop and follow these steps:
- Select the white balance dropper in the top toolbar.
- Click on the blackest or whitest point near the object that is the focus of your image. For example, if you took a portrait, you should look for a black or white dot on the person's clothing.
- Finally press "Done" to save the image with the corrected colors or "Open image" to process the image in Photoshop.
White balance in Adobe Photoshop
If the image is not in RAW format, you have to edit it yourself in Adobe Photoshop. Follow these steps to perform white balance:
- First, find the blackest or whitest part of the picture. A strong reflection in a pane, on a glass or the like is ideal.
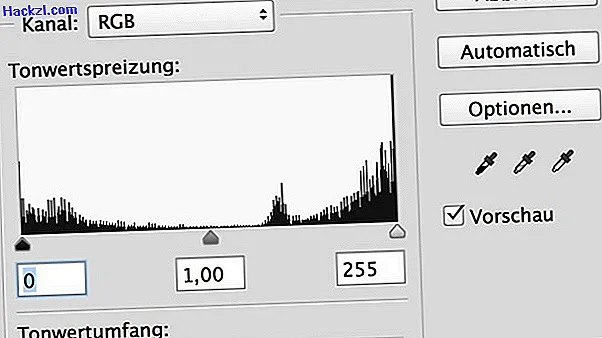
- Now open the tool for white balance via "Image" -> "Corrections" -> "Levels". Choose the white eyedropper if you want to adjust the white balance on a very bright spot or the black eyedropper if you want to do it on a very dark place.
- Now click with the pipette on the corresponding position in the picture. If you have hit a sufficiently black or white spot, the colors appear as they were in the shooting situation.