
Windows 10 Mail: create signature - how it works
You can create, change and delete a signature in the Windows 10 Mail app. Here we show you exactly how to do this.
Windows 10: Create signature in the Mail app
- Open the Mail app in Windows 10 and select "Settings" in the lower left corner.
- Decide here for the category "Signature", as well as for the desired mail account.
- Slide the slider next to "Use email signature" to "On" to activate the function.
- Now all you have to do is write your personal email signature.
- The signature is automatically saved and attached to the end of each email.

Create signatures in Windows Live Mail
In Microsoft's Windows Live Mail program, you can create your own signatures for your emails. The client then automatically attaches them to every new email:
- To do this, start "Windows Live Mail" and open your mailbox.
- In the menu bar click on "File"> "Options" and select the option "E-Mail".
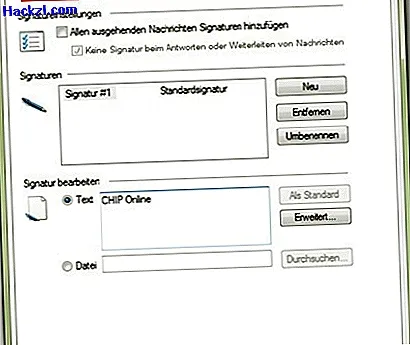
- In the new window, switch to the "Signatures" tab.
- Click on the "New" button and enter your desired signature in the text field of "Edit signature" (see photo).
- Alternatively, you can also click on "File" and "Browse" and import a desired HTML or text file as a signature
- Finally, confirm your settings with "OK".
Tip: How to create and change the signature in Outlook
In the next practical tip, we will show you how to dictate and send a mail with Cortana under Windows 10.