
Remote control Windows 7 via VNC - how it works
With the help of VNC you can control computers under Windows 7 remotely. We will show you how to set this up and control the PC remotely.
1. Install RealVNC for remote control of Windows 7
In this manual we use the free RealVNC program. You can also use other software such as TightVNC and UltraVNC, but it is structured differently and is not compatible with this manual. RealVNC runs on Windows XP, Vista, 7 and 8.
- Download RealVNC in the CHIP download area and start the installation file. For the time being, we only install RealVNC on the transmitting computer.
- Now click through the installation. You do not have to set or remove any further ticks here.
- In the last step you will be asked to apply for a license key. A website opens automatically.
- Simply select the "Free" variant here and enter your name and email address in the next step. In addition, select the option "Free license only, without premium features". Note: Name and email address are not verified or required for the license code.
- You will now see the license key that you now insert into the installation software. After assigning a password, RealVNC is ready for use.

2. Install RealVNC on the second computer
In order to control the first computer with RealVNC remotely, you do not necessarily have to install RealVNC on the second computer. You have several options here.
- App: Real VNC is also available as VNC Viewer for iOS and VNC Viewer for Android. With these apps you can access your computer from anywhere with your smartphone.
- Chrome: It is even more convenient with the VNC Viewer for Google Chrome. How to get the tool as an app for your browser. It is therefore not necessary to install the software.
- PC: Alternatively, you can also install RealVNC permanently on the second computer. The license key from the first installation is also valid here.
3. VNC: Prepare the transmitting computer
The computer that will be accessed later is the so-called "server". The computer from which you will later access the other computer is the "Viewer". So that the viewer can access the server, the viewer must first be set up:
- Click the Windows icon at the bottom left of the screen and select "All Programs" from the Start menu at the bottom.
- Open the "RealVNC" folder and select the "VNC Server" program.
- You will now see a small window. Under the "First Steps" and "Connectivity" categories you will find the IP address of the computer. You can write this down in advance.
- Click on the "More" button at the bottom left and select the "Options".
- Here you can click through the categories "Users and permissions", "Connections" and "Privacy".
- Among other things, you can change the password here again, only allow access on request or hide the desktop during the transfer.

4. Remote control Windows 7 via VNC
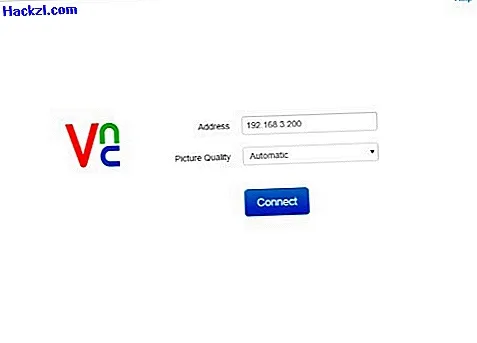
- Start the VNC Viewer, the VNC Viewer App or the extension in Google Chrome on the second computer.
- Type in the previously noted IP address of the first computer in the corresponding field and click on the "Connect" or "Connect" button.
- After entering the password, you can access the server computer.
