Windows: permanently set printer quality - how it works
You can change the default printer quality yourself. To do this, you have to call up the print settings. We'll show you how it works.
Set printer quality permanently
- Open the control panel. To do this, enter the search command "Control Panel" in the start menu.
- In the category view, under "Hardware and Sound" click on "Show devices and printers". In the icon view click on "Devices and Printers".
- Now the installed printers are displayed. Right-click on the printer for which you want to change the printer quality and select "Print Settings".
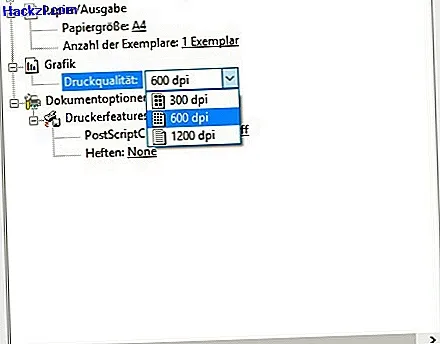
- Click on "Advanced" in the "Paper / Quality" tab. Here you can change the printer quality under "Graphics".
- The unit dpi stands for "dots per inch" and describes the dot density. Which dpi value makes sense depends on the print object. We show you how many dpi make sense for images.
- To save the change permanently, close all windows with "OK".