Windows: hard disk access denied - what to do?
Related Videos: Fix Hard drive Access denied [ Hard disk is not accessible ] (May 2024).
If you are denied access to the hard drive under Windows, this can have several reasons. In this practical tip, we will show you how to solve the problem.
Windows: Hard disk access denied
- If the file or folder is assigned to another user, access is denied here. If you are not an administrator, you unfortunately cannot solve the problem.
- You need certain permissions to open other users' folders. Certain permissions are also required for system files, since these are blocked for security reasons. You can read how to access such files in the next paragraph.
- The contents of the folder or file may also have been encrypted. Right click on the file and select "Properties". With the button "Advanced" you can see whether the option "Encrypt content" is activated (see picture).
- Another reason for denied access can be file corruption.

Get permission to access
If you have administrator rights, you can force the access authorization.
- Right-click on the desired file or folder and select "Properties".
- Go to the "Security" tab above and select the "Advanced" option.
- Windows 8 and older: Switch to the "Owner" tab and click the "Edit" button. Select your account here and click on the "Apply" button.
- Windows 10: Click on the "Add" button below, on "Select Principal" above and enter the name of your user there. Confirm with "OK" and activate all required authorizations.
- Close all windows with "OK" and open the "Properties" again with a right click.
- Switch back to the "Security" tab and click on the "Edit" button under the "Group or user names" category.
- Select your account above and activate the "Full Control" option.
- Close all windows with "OK" and try to access the file again.
Windows: No access to the hard drive
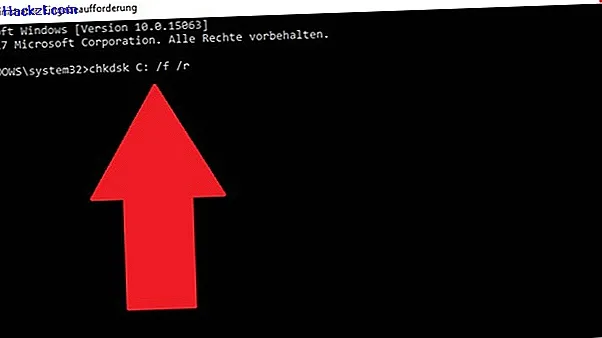
In some cases, a hard drive error can also lead to the access problem.
- Start the command prompt as an administrator.
- Now enter the command "chkdsk X: / f / r" and confirm with the [Enter] key.
- Replace the letter X with the letter of the desired drive (usually C). Your hard drive will now be checked for errors.
- The process can take several hours. You can still use your PC: However, to make things go faster, you should leave Windows alone.
- If an error is found, Windows will automatically try to fix the problem.