
Word: Creating multiple tables of contents - is that possible?
If you want to make a large Word document even clearer, you can create several tables of contents. We show you how this is possible.
Word: Prepare multiple tables of contents
In this manual, our Word document contains several headings. The first and last headings each have a table of contents, so that our Word document has two tables of contents at the end.
- First, the headings must also be marked as headings. If this is not yet the case, mark the headings with the mouse and select a heading option in the "Style sheets" above.
- Now mark all headings and their texts, which should reach the first table of contents. If the text is not connected, you can also mark texts that are far apart by pressing the [Ctrl] key.
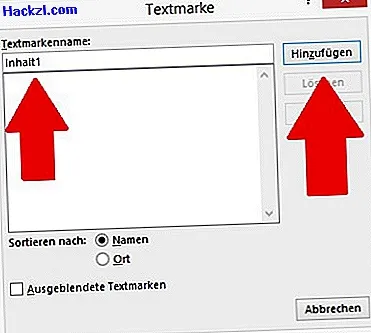
- Go to the "Insert" tab above and select the "Bookmark" from the "Link" category. Give the bookmark a name and click the "Add" button.
- Repeat this step for all other areas that should have their own table of contents. In our example, we have now created the bookmarks "Content1" and "Content2".
Word: Create multiple tables of contents
The bookmarks have already been created, now the two tables of contents are created. To do this, click with the mouse in the area where you want to insert the first table of contents.
- If you press the [Ctrl] and [F9] keys simultaneously, two special braces are inserted in Word.
- Now enter the command "TOC \ b" in the brackets, followed by the name of the bookmark.
- In our case, the command looks like this: {TOC \ b content1}.
- If you then press the [F9] key, the table of contents is inserted.
- You can now carry out these steps for all other tables of contents.
