Word: Customize toolbar
Related Videos: Word 2016 - Quick Access Toolbar - How to Customize Add and Delete Buttons to and From in MS Office (May 2024).
In this practical tip, we explain how to customize the toolbar in Word. You can adapt the user interface to your personal way of working.
Customize toolbar in Word: make favorite commands quickly available
- The "Quick Access Toolbar" is located at the top left, above the "File", "Start", "Insert", etc. tabs.
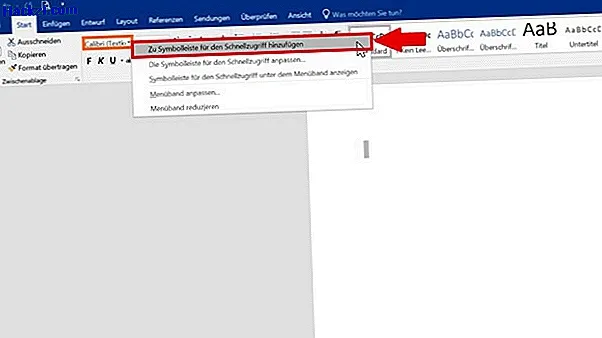
- To customize the toolbar, click the small down arrow on the right end of the toolbar.
- In the dropdown menu that now opens, you can add functions to the toolbar by clicking on them and placing a check mark.
- You can also click "More commands".
- Now the "Word Options" open. Here you can mark commands on the left and use the "Add" button to move them to the right and thus add them to the toolbar.
- Save the changes by clicking "OK".

For better access: place the toolbar differently
You can also position the quick access toolbar differently.
- Click the down arrow next to the toolbar.
- In the opened menu, select "Show under the ribbon". The bar now moves directly over your document.
Add commands from the ribbon for quick access
You can also customize your toolbar from the ribbon:
- Right-click an icon on the ribbon.
- Then select "Add to Quick Access Toolbar".