
Draw in Word - there are these possibilities
Although Word is a pure writing program, you can insert individual symbols and draw sketches yourself. We explain where you can find the corresponding functions in Word and how to use them.
Basic instructions: Drawing in Word
- After you have opened your Word document, click on the "Insert" tab.
- Select the "Shapes" menu item there.
- You can only choose from several pre-made shapes. To place a shape, click on the desired representation and drag it to any size in the document with the mouse.
- With the sub-item "Lines" you can select the "sketch". This allows you to draw freely. However, as soon as you release the left mouse button, you have to select the shape again in the menu.
- If this drawing function is not enough for you, you have to use a drawing program such as Paint.Net. There you create your drawing and insert it as an image under "Insert"> "Images" in your Word document.

Word drawing tips
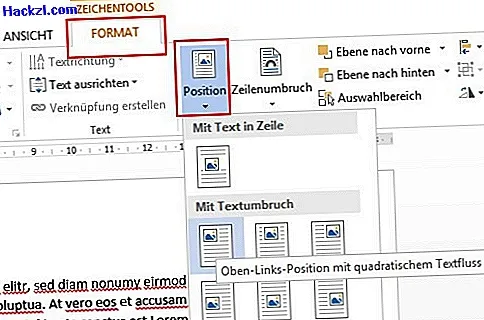
- When you insert the shapes, they are placed over any existing text by default. However, if you want the element to be behind the text, for example, click on the shape and select the "Format" tab. There you can determine the arrangement under the menu item "Position".
- In the function tab you can also set how the shape or drawing should be designed. You can adjust the color, lines and contours there.
- If you use multiple shapes and you want to avoid placing them individually in the text, create a drawing area. You can also find this under "Insert"> "Shapes"> "New drawing area". This drawing area can be formatted and moved independently.
We explain in detail how you can insert an image in Word on the next page.