
Install WordPress on Mac OS X - Here's how
Related Videos: How to Make a WordPress Website 2020 - Step by Step for Beginners! (May 2024).
WordPress can also be installed and used locally on MacOS X. In this guide, we show you how to proceed.
WordPress for Mac: requirements and software
In order for WordPres to run locally, you need the freeware "XAMPP", which simulates the functions of a web server. This is how MySQL and PHP run directly on your Mac. Read how to install XAMPP and start the required features.
Mac OS X: Create a database to use WordPress locally
- Enter "localhost" in the address line of your browser.
- Then switch to "phpMyAdmin".
- Click here on "Databases" and then "Create new database".
- Then you can give the database any name you want. Select the "utf8_general_ci" option under "Collation".
- The database is created by clicking on "Create".
- Then switch to the "Rights" tab and click on "Add user".
- Now enter a user name.
- Select the "Local" option under "Host", since the database should only be used on the Mac.
- Enter a password for the user and make sure that the option "Grant all rights to the database [yourDatabaseName]" is selected under "Database for users".
- Click on "OK" to apply the settings.
Install WordPress locally on Mac
First download the latest version of WordPress.
- Then unzip the downloaded file.
- Copy all files into the "htdocs" folder of XAMPP. You can find this in the main directory of your Mac.
- Now switch to the browser and enter the address "localhosz / wp-admin / install.php".
- You receive the message that the "wp-config.php" file does not exist. By clicking on "Create the configuration file" the required file will be created automatically.
- You will now be shown installation instructions that you should note. Click on "Let's go" to start the installation.
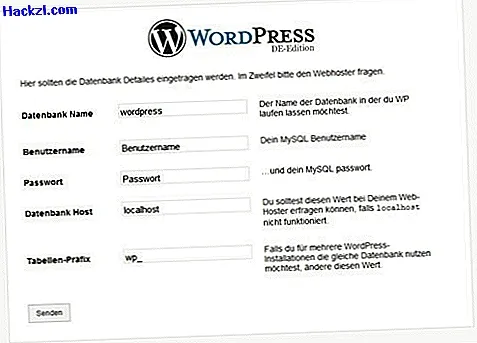
- In the next step, the database data is displayed. Enter the name, user name and password of the database that you created in the previous step.
- Click "Send" to continue with the installation.
- In the next step you can assign a title for your blog and create the admin account.
- After you have finally clicked on "Install WordPress", the software will now be installed completely.
- You can then log in to your browser under "localhost".
You can use plugins to refresh your WordPress homepage. We have summarized the ten most popular plugins for WordPress for you in the next practical tip. This practical tip is based on WordPress 4.0 Final on Mac OSX.