
App Inventor: Create Android app - a tutorial
In this practical tip, we explain how to create Android apps with the App Inventor. Follow this tutorial to build apps in a relatively short amount of time.
Sign in to MIT App Inventor
Go to the App Inventor website and click on the "Create" button in the top right corner.
- App Inventor requires permission to access your Google account. Confirm by clicking on "Allow".
- After the first login you can take part in a survey. If you do not want this, click on "Never take survey".
- Then click "Continue" to the App Inventor workspace.

Create the first app in the App Inventor - the layout
- Click the "New Project" button in the upper left corner. Enter the project name and select "Ok".
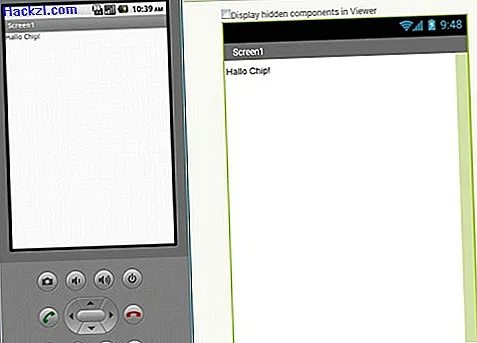
- Now drag a "Label" from the "User Interface" on the left into the screen shown in the middle. Under "Properties" you can change the "Text" for the marked newly added label.
- Save your project via "Project" and select "Save project".
- You can now slide all other UI elements onto the screen. Other media content can also be added via "Drawing and Animation".
- Use "Layout" to change the arrangement of your elements.
Logic over the blocks - an example
If you want to create additional screens for your app, click on "Add Screen". You can then, for example, go to the second screen in your layout using the "Button" UI element. To do this, however, you need logic running in the background. In the App Inventor, you build them using the "Blocks".
- To do this, click on "Blocks" next to "Designer" in the upper right corner. There you go to the corresponding screen and click on the button in the left "Blocks" display.
- Select the functionality "when Button1.Click do".
- Now insert a "Control" element into this "Puzzle" element, namely "open another screen screenName".
- Now only the screen name is missing. To do this, click on "Text" in the Blocks display and select the top element, which consists of only two quotation marks.
- Enter the name of the screen in this text element, in this example "Screen2".

Test the app on your smartphone
If you want to test your apps created in App Inventor directly on your Android smartphone, follow the steps below.
- Install the MIT App Inventor Companion App on your Android smartphone.
- Check that your computer and Android smartphone are on the same WiFi network.
- Open the app on your smartphone and click on "Connect" in the top menu bar on your PC and select "AI Companion".
- Tap "scan QR code" in the app on your smartphone and scan the QR code displayed on your PC. Alternatively, enter the 6-digit code shown in the text field of the app and tap the "connect with code" button.
- The app can now be tried out on your Smarpthone.
Test the app with the emulator
If you don't have a smartphone available, then test your app on the emulator integrated in the App Inventor.
- Download and install the App Inventor software.
- Now open the installed application. A mobile phone screen opens on your PC.
- Now click on "Connect" in the menu bar of App-Inventor under your open project and select "Emulator" there. You may have to tap "Reset Connection" if you were previously connected to a smartphone.
- The application is now displayed in the emulator.
- In some cases you will see an error message. The Companion app is therefore no longer up to date. Then click "OK" in the window that appears.
- Confirm the update in the emulator with "OK" and "Install". Finally, click "Done" on the emulator screen.
- Connect again via "Connect" -> "Reset Connection" and then "Connect" -> "Emulator".
When you have created your app, you can save an .apk file of your app on your computer in the menu bar via "Build". Once you've published the app on Google Play, you should also think about marketing your app.