
Create bibliography with OpenOffice
You can also have a bibliography created in OpenOffice. All you need to do is format your document correctly. This guide shows you how to do this and how to add the formatting quickly afterwards.
Open Office: Create bibliography entries
Before you can create a literature directory, you have to create links in your text:
- Click with the mouse on the point in the text where you quote a work or refer to a book. Then call up the "Directories and Tables" option in the "Insert" menu and select "Bibliography entry ...".
- Now a new window opens. Under the "Entry" category, select "From document content" and click "New".
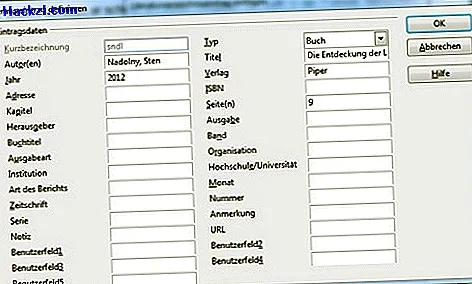
- In the next window you can enter all information for the literature entry. It is important that you create a different abbreviation for each work, as this will initially be visible in the text. When you are finished with the entry, click "OK" and then "Paste".
- Your text now contains the "short name" of the bibliographic entry (in gray and in square brackets). If you want to add the reference, mark the abbreviation with the square brackets. Right-click on it and select "Superscript" under "Style".
- Repeat this process until you have linked all entries. If you want to link an entry several times, select the short description of the book in the "List of bibliographic entries" and click on "Insert".
Create the literature directory with OpenOffice
- Navigate with the mouse to the end of the text for which you want to create the literature directory and select "Insert"> "Directories and Tables"> "Directories ...".
- In the new window, under "Type and title" call the type "Bibliography". You can then choose whether parentheses should be placed around your entries or whether they should be numbered.
- In the "Entries" tab, you can change the structure of the individual entries and, for example, determine the punctuation marks between the entries. In the Background tab you can also optionally set a background color.
- If you press "OK", your bibliography will be created.

In the next article, read how to insert diagrams into your document.