
Windows: hide files and folders
On multi-user systems such as Windows, it may be necessary to hide folders and files in order to prevent other users from accessing them.
Quickly hide files and folders
The simplest solution is to set the so-called hidden attribute.
- To do this, right-click on the relevant file or folder and go to "Properties".
- Check the box next to "Hidden" and confirm with "Apply".
Hide files and folders safely from certain users
Unfortunately, the measure mentioned above can be easily bypassed by any user, since the file explorer offers the possibility to display hidden files or folders. With the following instructions you can regulate access much more effectively. That's how it works:
- Simply move the files and folders to be hidden into a collective folder, the access of which you can regulate.
- Now right-click on the folder and select the "Properties" option from the context menu.
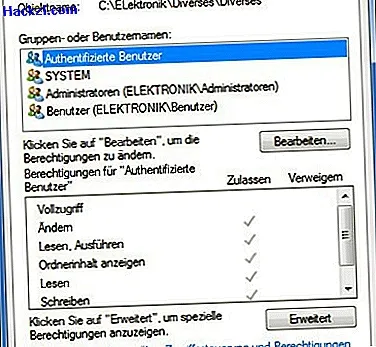
- In the "Security" tab, you will see the user groups under "Group and user names". If you click on a specific one, you can see which rights the user has in the box below.
- You can now either create a new user whose rights you want to restrict or revoke an existing one.
Add users whose access you want to restrict
If you want to determine a new user, first proceed as follows:
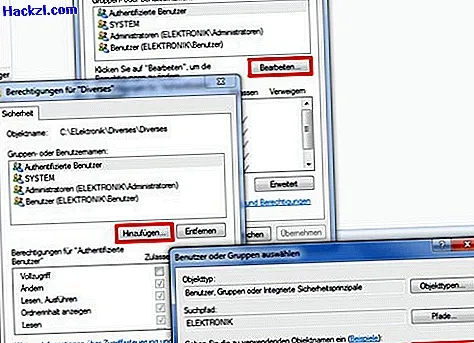
- Now click on the [Edit] button and then on the [Add] button.
- In the "Select users or groups" window, enter the name of the user, eg "Sven", and then click on the [Check name] button and then on the [OK] button.
Revoke users' rights to folders and files
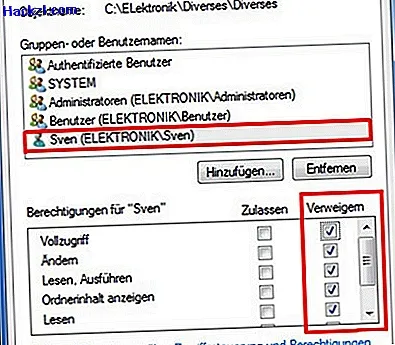
- The user "Sven" is now in the list that you already know from point 1. Now mark the user "Sven" by simply clicking on his name entry.
- In the lower window "Authorizations for 'Sven'" you can now see the current authorization settings. To remove all access to the directory from Sven, click in the "Deny" column on the "Full access" checkbox and then apply the settings by clicking on the [Apply] button.
- To withdraw access to other users, simply click the [Add] button again and start again with step 2.
- Click the [OK] button if you do not want to add any more users or groups to the list.
Please note that the assignment of rights under Windows is much more complex than shown in this small example. Any user with administrative rights can undo the settings specified above - however, this applies to all settings. For example, if you want to set up restrictive rights assignment in a small company network, it is important to deal with this topic more intensively.
Read how to protect a folder with a password in Windows 7 here.