
Photoshop: Create HDR images - how it works
You can create fully exposed landscape images with High Dynamic Range Photos (HDR). For this you need a tripod and Photoshop.
Shoot HDR images manually
First of all, you need the right pictures. You should take 3 or 5 pictures with different exposure levels. Be sure to use a tripod for this.
- You can shoot them manually. To do this, you have to set the aperture and ISO value and then focus on the subject. Now you should switch off the auto focus.
- Change the shutter speed to get a normal, underexposed, and overexposed image.
- Any change in motive can have a strong influence on the result. Therefore try to take the pictures in quick succession.
AEB bracketing
Some camera models do the exposure change for you. You have to activate the AEB automatic exposure bracketing in your camera:
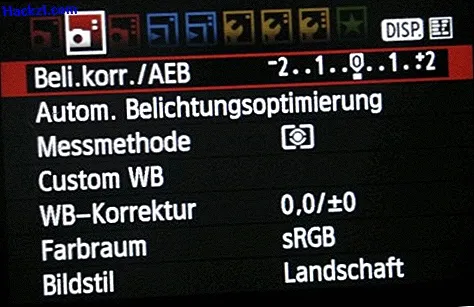
- For the Canon EOS 550D / 600D, go to the camera menu.
- Select "Beli.Korr./AEB" and set the desired spread value with the main dial.
- It is best to use the value - / + 2.
- Confirm the value and focus on the subject. A tripod is essential.
- The camera will now shoot the three images in the following order: standard exposure, underexposure and overexposure.
Create HDR images in Photoshop
You can now easily combine the created images in Photoshop:
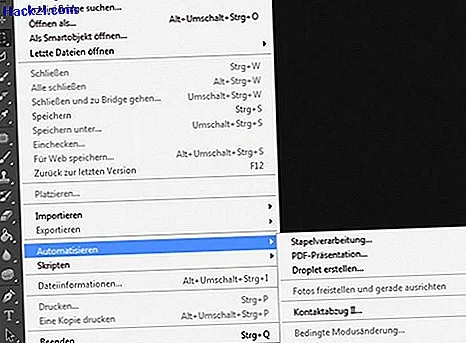
- Go to "Automate" under "File" in Photoshop and select "Merge to HDR Pro".
- When selecting the files, make sure that the standard exposure is inserted first, then the underexposure and finally the overexposure. The process can take some time.
- You will then receive an image without shadow and with many details. Now you can adjust your HDR image as you like.
Another article tells you how to create an 8-bit effect in Photohop.