Burn iPhoto slideshow to CD
In this practical tip, we will show you step by step how to burn a slideshow to CD using iPhoto.
Burn slideshow to CD with iPhoto
Before you can burn your slideshow to CD, you need the paid app iPhoto. After you have installed it, you can start:
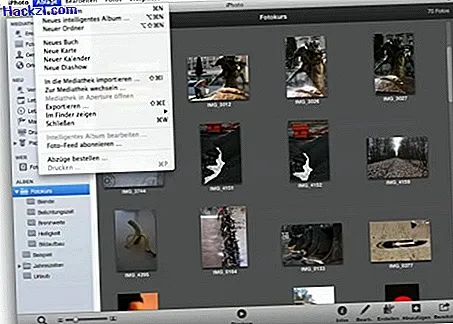
- When you start iPhoto, it automatically searches for shared libraries on your computer. These are shown on the left in the iPhoto menu. Alternatively, you can also create your own album manually under "File"> "New album".
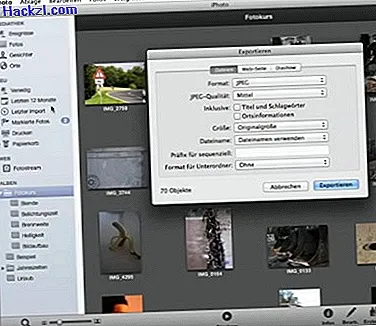
- Once you have made your selection for the slideshow, click on "File"> "Export". A menu window opens with the "Slideshow" tab. Here you can determine the order of your slide show. Under the "Files" tab, you can, for example, determine the image size and format. As soon as all settings have been made, click on "Export".
- Another window opens in which you can specify the storage location of the exported images. It is advisable to create a folder on the desk, for example, to keep an overview. Then click Create to start iPhoto exporting.
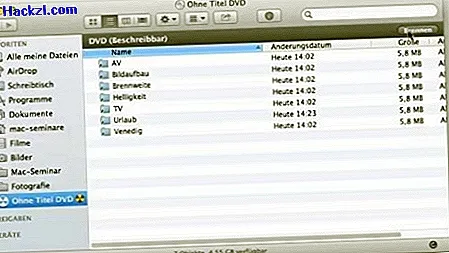
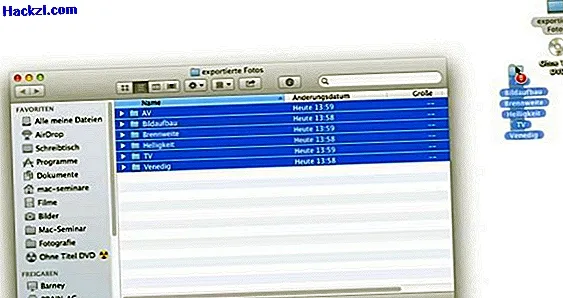
- Insert a blank DVD / CD into your drive and confirm the action "Open Finder" with "Ok". Then open the folder with the pictures and drag & drop the photos onto the blank.
- If you now open the blank in the Finder, the "Burn" symbol appears in a gray bar at the top right. Click on it and determine both the name of the slide show and the burning speed.
The screenshots used in the instructions show iPhoto on an Apple iMac. The app is also available for the iPhone and iPad. Tip: In this article we will introduce you to the most important photo editing functions in iPhoto.
Latest videos
The iPhoto interface with the File menu.
The menu window of the "Export" option. Make various settings here, such as picture format and sequence.
Open the blank CD / DVD in the Finder.

Drag and drop the exported images onto the blank.
The opened blank in the Finder with the menu bar and the "Burn" symbol.